Monday, December 13, 2010

Clip-in extensions confessions


Confession time: I have worn hair extensions all my life, that you already know, but did you know that I never wore full clip in extensions?(Don't think a clip-in bang counts). Nor have I worn Indian Remy hair.
I was able to achieve both in one evening when I was asked by Danielle Jones, former Miss Universe T&T and co-owner of the newest hair store in Trinidad Hair It Is, to be a part of a demo on the ENV 100 percent Indian Remy Hair this past weekend.
It was only recently that a reader of this blog wrote to me asking me to write about Remy hair . But honestly all I knew of it was what I read. That the hair is one of the most loved types of hair extensions in the world because of its natural look. That Remy hair, unlike most hair extensions sold, is not processed with any chemicals and is 100 percent organic.
That care of the hair is taken from the time it is cut from a donor's head to ensure that the cuticles remain intact.
Remy hair also matches well with different types of hair and can be coloured to suit the wearers own hair colour.
Having worn sew-ins and stick-ins hair extensions before, I was pleasantly surprised by the ENV Indian Remy clip-ins. At first I thought that the seven pieces in a pack could never be enough since I am accostomed to having ten-12 rows in when I do sew-in weaves.
My hair was parted, backbrushed (teased) to ensure that the clip ins had a rough area to hold on to and then clipped in by stylist Skylar of Hair it Is. The clips are little combs attached to the hair extension which are pressed down to close and pulled up to open. A clicking sound lets you know that the hair is locked in.
As sparse as the hair looked in the pack, once added to my real hair it not only added body but length.
Unlike sew-in hair extensions, clip-ins are not harsh on the scalp which means you don't have to take a pain killer immediately after getting it done! The clip-in process is also quick - done in about 20 minutes tops and can be taken out and put back at home by the wearer with no assistance.
With the clip-ins on I was able to achieve up-dos and styles that I couldn't with my natural hair and some weaves. There was also no "heavy weave" feeling since the hair is so lightweight.
A quick tip though, based on my experience with the clip-ins, it may be best to label each piece to ensure that the pieces always line up the same. I labelled my hair pieces from one to seven on masking tape which I stick on their combs when they are not in use.

Hair care for ENV's 100 percent Indian Remy is much the same as taking care of your own hair.
Hair should be taken out and washed to maintain its natural shape.
Always use a low PH moisturising shampoo and conditioner ( PH is potential hydrogen). A high PH would make the shampoo too harsh for the hair.
To style hair use a soft bristle brush starting from the bottom and gently work your way up.
• At night, tie your hair up gently or wrap it to prevent tangling.

Here are some before and after shots of me taken at the ENV's launch in South Trinidad last Saturday.

And here is the all-natural look that former Miss T&T Universe and Hair it is Co-owner Danielle Jones was able to achieve with her ENV clip-ins.

Hair it is is on Facebook.

Tuesday, November 23, 2010

Instant weaves/half wigs - what you should know


I have been missing in action - I know, but it is not because of a lack of zeal for keeping my blog up to date. I started beauty school because I wanted to learn more about this hair business and after doing my "own thing" to my hair for years, I wanted to learn about the right way to take care of my hair and the right way to add my extensions.
In my time away from this space I have been observing the mistakes of my fellow hair extensions wearers.
I jumped into a taxi two weeks ago and was mortifed by what was left of an instant weave/half wig - those weaves that are attached to the hair with combs. The wearer, a mature woman was well dressed except for the strings of hair that she piled high on her head.
Now if you are going to wear an instant weave, a high pony tail is not such a good idea - it tends to bulk in the areas that are without the combs and makes your hair look big and poufy.
Another rule of thumb for wearing instant weaves is to leave them be! You don't have to brush them to death like the lady in the taxi appeared to have done. Instead, use a bristle brush only if they get tangled. But for the most part finger comb them.
Excessive brushing, particularly on cheap hair, only leads to less hair on the half weave cap, as in the case, again, of the goodly lady in the taxi.
I always advise my friends to ensure that they match their instant weaves with their real hair in colour and texture. If the look is not seamless ie people would have doubt that you hair piece couldn't possibly grow out of your scalp, then that instant weave is not for you.
Since instant weaves require that you leave a little more than your hair line out, you have to select your hair carefully for believable results.
I have seen women about town wearing their instant wigs the wrong way, with the wig's hairline on their foreheads. That not only looks laughable but it looks unreal. Make sure that your own hair covers the hairline of the wig. Honestly it's not supposd to be seen.
Instant weaves are great if you don't want the committment of a sew-in or stick-in weave or you are trying hair extensions for the first time.
Here are some examples in photos of the right way to apply an instant weave (the model with the long hair), what happens when you choose wrong textures - curly instant weave vs relaxed hair ( on model with short curly 'fro) and the wrong way to wear an instant weave (as seen on this mannequin). Like I said earlier on a mannequin it's okay for the hairline of the wig to show like this. On a real wearer, this hairline should be covered with one's own hair.
Finally if you're really thinking about an instant weave know that the options are endless. Here's a a video on the right way to put on instant weaves. You Tube favourite channel muffinismylover.

Friday, October 1, 2010

Wigging it


I love wigs. Even the granny type ones they still stock at hair stores. But here's where the average wig buyer and I differ.
As ugly as the wigs look on the mannequins, when I get my hands on them they go through a transformation.
I either change the colour (if it's human hair) cut it or add weave pieces in a different colours for a streak-like look.
Full wigs, so named because they cover the head entirely, may no longer be as popular as their lace front counterparts, but there are some really realistic looking ones to be found. Even better, the price on these wigs run from $30 US upwards. You pay a little more if the wig is made of human hair and less if the hair is made of synthetic hair.
When choosing a full wig bear the following in mind to ensure you make the right choice.


. Try it on at the store in front of a mirror. This will ensure that the colour works well with your skin tone as well as the style and length. If the store attendant says no to trying on the wig then move on to another hair store.


. Try as many wigs as you like rather than buying the first one you try on.
It may look good on you but there is bound to be another wig in the store that would look even better.


. Ensure that the stiff pieces on either side of the wig line up to the side of your ears. If they don't, maybe one side touches the ear and the other touches your temple), that's a clear indication that you have put the wig on wrong.

.Spend your money only when you feel comfortable in the wig. If you don't tell the store attendant you'll take a rain check.

.If you do buy the wig remember that, unlike human hair, synthetic hair don't respond well to heat products.

. Drape, not bag, your wig when you get home. It can be on a mannequin head , the expensive or cheap styrofoam ones or drape it over a big milk tin.

. If the wig is made of synthetic hair, stay away from oily products to avoid a too-shiny look.

. Be realistic. If the wig looks like it could never be your own hair tell it bye bye and move on. The trick is that when people see you wearing your wig their first thought must be that you did something with YOUR hair.


. Last but not least, don't be afraid to wash your wig. In a bowl of warm water and shampoo swish the wig around, rinse , gently squeeze out excessive water from top to bottom and then hang to dry.

Photos show: These synthetic wigs look as real as natural hair. That's what you should be going for.

Wigs on this page available at http://www.thewigs.com/

Monday, September 20, 2010

Lace Eyebrows - extensions for the eyebrow


Yawn!!
Lace front wig-wearing babies are so yesterday. And, just to add my two cents worth to that topic, I have no problem with putting on a cute wig on a baby FOR PHOTO SHOOTS ONLY!!! If you're doing that for day to day real life scenarios, then you need to get a life.
That out of the way, let's move to today's business.
You know that I've been raving about lace front wigs and the all natural look it gives to wearers since it came out right? But it was only until recently that I discovered lace eyebrows - extensions, of sorts, for your eyebrows.
Don't laugh! I kid you not! They are as real as the hair underneath my 10 inch straight weave. If you are like me and you are lacking in the eyebrow area, lace eyebrows may suit you. As those of us with scant eyebrows know, no matter how much waxing you get done, hair on the eyebrows never seem to multiply. Don't get me started on arched eyebrows. Everytime I go to the salon to ask that they be done, I am always reminded that I don't have enough hair to work it.
The lace eyebrows, much like the lace front wig, are sewn on lace net.
The strips are then adhered to using adhesive and the result is just as seamless as the lace front wig hairline.
Prices of the lace eyebrows, from what I have seen so far, range from $25US and upwards. The eyebrows are made of human hair and come in the colour ranges just like hair extensions and buyers can also choose the style they want for their eyebrows .
Reviews from actual wearers of these brows range from fair to outright disgust. Men hate them, of course and can't seem to understand why women would go to so much lengths for beauty.
You know I am an extension wearer but lace eyebrows seems a bit much to me. Still I'll try any hair extension, just once.

Friday, September 17, 2010

Gabourey Sidibe - The hair , not the woman


OMG!! It's like Gabourey Sidibe can't seem to catch a break. She is a plus size woman who is now seen as a breakout star without the star presence - she's more like girl you can kick it with on a stoop in the hood - and, with the latest Elle cover, she seems clearly in need of a hairstylist too.
Don't get me wrong . I am not one of those hate-Gabourey-because-she-is-fat, persons. But as a plus sized woman myself I love to see big women looking their best. And even if you have to wear a sack and nothing else, I have found out that it's how you wear your hair that often pulls you out.
Ever since Gabourey attended her first red carpet do I have been paying attention to her extensions. On the night that Monique won the award for the movie Precious, of which Sidibe was a supporting actress, her extensions were wavy, unbelivably shiny and doll like like a ghetto Barbie!
It was undoubtedly synthetic hair she was wearing that night. And what we were seeing was a "melt down" of sorts with the plastic hair caused by the hot lights of the tv crews in attendance and the steaming Los Angeles sun.
I watched her again on Saturday Night Live. It was the same wig but this time it looked brushed out and messy.
Now this cover.
While I applaud Elle for celebrating Gabourey in the way they did, they should have at least done something about her hairpiece. In the past the mag has done so for Sidibe's fellow extension wearers Jessica Simpson and Britney Spears .
Instead, they airbrushed Sidibe so that she looked shades lighter while her hair stood big and tall and stiff like those wire pot scrubs. She may not be an A- Lister star yet but with her the little star wattage she's got Sidibe needs a professional hairstylist to guide her, particularly for cover shoots.
With all those lace fronts wigs selling a dime a dozen, Remy weaves in various colours and even braids, Sidibe should at least wear a style that would make her stand out. (Like the Black and White photograph of her attached)
Personally, if I was Sidibe's hairstylist I would give her one of those curly styles like Oprah's or curly micro braids with hints of honey blonde (see how honey blonde brings out her features in the photo).
I wait with bated breath to see who is up for the challenge of uncovering the hidden beauty that is Gabourey Sidibe.

Thursday, September 9, 2010

Hair extensions "star" in hair show


I went to my first hair show two weeks ago and was amazed at the many ways one can use those tacky coloured synthethic braids.
Students from the beauty department of the Civilian Conservation Corps were challenged to create their masterpieces using mainly hair extensions and their choice of accessories.
I must say the girls brought their A-game and really dug deep into their bag of tricks.
Synthetic braids were coiled, stretched out, twisted and fanned out with stunning results.
Weave pieces were also used , although not much as I thought it would.
Accessories included plastic fruits, beads, straw, a light bulb and even a plastic bird.
In the end it was the girl with the simple design who won out for her creativity. And given that the competition is held in a Caribbean island, one would almost expect that a hair style of coconut trees with a hammock swinging freely between them would get the judges nod.
Photos: Jennifer Watson

Thursday, July 29, 2010

Traction alopeia and hair extensions


At what stage of your life does it become clear that you should stop wearing weaves? When it gets to be about the stage of Naomi Campbell's hairline (see photo).
Shocked and kind of angry was how I felt when I first saw the photo of Campbell's severely damaged hair line. If you have a passion for hair extensions, it should never be to the detriment of your own hair. Traction alopecia is sadly something most extension wearers are dealing with now after years of wear.
Alopecia is the clinical name for hair loss. Traction alopecia is a result of pulling the hair too tightly in a ponytail, which , according to a local dermatologist, "puts the hair margin under constant traction (pulling).”
Weaves and braids also of traction alopecia. But it should be noted that most women who suffer from it find wigs and weaves easy to cover up the balding areas.
Another cause of alopecia is relaxing the hair. If the chemical is left too long in the hair it can burn the scalp and cause damage to the hair.”
Hair loss in a woman can also have genetic causes. If a mother has lost her hair early in life; so will her daughter.
The condition is called female-pattern baldness, which 20 million American women are said to suffer each year.
When a woman loses hair, she usually does so in a different way from a man, with a woman’s hair loss being an overall thinning — two hairs where five used to be – rather than a bald area at the top of the head.
There are also some medical remedies for hair loss.
Rogaine, however, is approved for women and is said to be one of the better treatments for hair loss. Available in cream and liquid, Rogaine offers two versions, one with a two per cent formulation of minoxidil, which has been approved for men and women; and another with a five per cent formulation of minoxidil, which is not recommended for women because of its potency.
Extensions, with its many cuts and colours come and go but your real hair is all you will be left with at the end of the day. You owe it to yourself to give it some TLC and take care of it.
Here are my four step love your hair tips.

. Do massage your scalp with oils to stimulate growth
. Do sleep with your hair opened at least once a week - set it free from the rubber bands, scrunggies et al
. Do buy products, no matter how expensive you may think they are, for your hair. They are like food for your hair.

Thursday, July 22, 2010

Colour by numbers


Just as you identify a paint colour by its name you can identify a hair extension colour by its number.
New hair extension wearers who are sent to buy hair always find the exercise of selecting hair that match their natural colour, tricky.
And if they happen to meet a hair sales person who just wants to make a quick buck off them then they are in big trouble.
I once went shopping for a pack of braids when to my horror I saw a sales lady try to sell red extensions to a lady with brown hair.
You should have heard her trying to convince the woman that the hairpiece was the exact colour of her hair.
The woman, upon noticing the look on my face, asked me for a second opinion. I spoke up and told her that the hair infact didn't match and that her shade is more 4 than it was 33.
To make sense of the numbers I just quoted, I thought that today I would share with you just what those numbers on the pack of hair extensions mean. Bear in mind that some colours vary from product to product.
Some manufacturers may make the hair darker, some lighter. As you know I wear the colour number 4 in hair pieces. But sometimes I swear to you, the number 4 looks green in some brands. It will be in your interest then to ask for a mirror, request that the salesperson take the hair out of the bag so that you can see it better, and hang the slightly opened pack close to your hair. It's only then that you will know for sure if the hair is a perfect match or if it goes back on the shelf. If the salesperson says she can't open the pack, tell her thanks and look for another store that will allow you to do so. Here are the numbers and the colours that go with them.

#1- Jet black
#1b - black but not as strong as jet black
#2 - dark brown
#4 - brown
#6 - medium chestnut brown
#8 - light Chestnut Brown
#10 - medium brown
#27 - strawberry
#33 - dark auburn
#99J - plum red
#130 - copper red

Hair extensions also come in two combined colours to make for a believeable look. The dark colours (like the 1b /30 combination) also help to "tone down" some of the brighter colours. Some popular hair extension colour combinations (in both hair weaves and braid extensions) are :


6/18 - medium chestnut/ash brown

4/30 - Dark chestnut / light auburn

4/27 - dark chestnut/strawberry blonde

8/24 - light chestnut / golden blonde

1b/30 - black/light auburn

1b/27 black/strawberry blonde.

Wednesday, July 21, 2010

De-weave - let your real hair exhale


One thing I have learned in my years of wearing hair extensions — you must give your natural hair a rest sometime.
Sure hair weaves and fun to wear and easy to style, but underneath the weave tracks your own hair needs to be set free from the tight cornrows that make the tracks.
For those who stick in their weave pieces (eliminating need for cornrows),the need to take frequent breaks from weaves is even greater.
Stuck in weaves not only result hairloss (if not properly taken out) but also should not be worn for long periods at a time.
I have found that three months of wearing a sew-in weave (with intermittent tighting), is enough. Then it is time for a break.
If you’re a hair lover like I am, your break from extensions will last about a week before you get that urge to put it back in again. Remember when the media made a whole hullabaloo about Tyra Banks returning to her roots and how weeks later she was back in the salon chair for a weave? (She actually said she was parting with weaves just for one day but the media didn't get that part).
Even if you return to the weave after a week that's your choice. Personally I would think three weeks is a good rest period. While you are “resting” your hair it is good to give it as much love as possible.
I use Vitale's virgin olive oil for the hair to massage my scalp and I stay away from those heat-based styling tools.
I can’t emphasise to you how great it feels to have water on your scalp during a shampoo (some people use dry shampoo* when wearing a weave) and the warm sun on my scalp when outdoors.
Sure you’d feel a little bit self conscious when you take out the glamorous weave and start wearing your own hair. But the benefit of this exercise is a healthier head of hair. And what’s better than that?

* hair shampoo is a gel like product with a minty smell. It is to be applied to the scalp either using a cloth or cotton balls and it actually cleans your scalp. Look out for that tingly feeling in the scalp when the gel touches the scalp.
It is used by many women so that their tracks stay tight longer and to prevent that awful wet-weave smell that wearers get when washed hair is not properly dried.

Photo: Solange Knowles, Beyonce's little sister not only took a break from hair weaves, she cut her own hair off as well and now sports healthy hair.

Thursday, July 15, 2010

When less is more


A male friend, already familiar with my love for weaves and hair extensions, watched me sitting across from him during lunch recently and asked me if I took off my weave. I laughed and almost choked on my grilled chicken and callaloo dish at his question. Poor thing was puzzled as ever at my sudden burst of laughter.
No, I told him, I just put in a different one. He had a look of doubt on his face.
"But it doesn't look like a weave."
Aha. And that's the thing. What should a hair weave really look like? Well for those who don't have a clue about weaves, it should be very long, silky straight and dolly like and bulky.
But not all hair weaves are created equal. Some women prefer the bulky look because they think it makes them look like healthy hair is growing out of their scalp. Other women, like me, believe that less is more.
That's why my friend found it hard to tell that I was wearing a weave.
At a recent fashion event a woman raised more than a few eyebrows and a few snickers too, with her long thick lion's mane hair weave.
In the meantime my less is more weave went unnoticed.
To achieve a less is more hair weave consider these tips

. You don't have to use up all the hair contained in two packs of hair just because you bought two packs of hair

. For hair extensions that are fine you can get away with two packs of hair

. For hair extensions that are curly you'd find that one pack of hair alone would do the trick

. Try tracking (leaving out some of your hair and adding fewer rows of the weave pieces) to get an unweave-like look.


. Try shoulder-length weave pieces instead (10 to 12 inches rather is 22 inches)

Check out Niecy Nash's photos with less pieces in her hair weave and with more hair weave pieces in. In which one the photos does her weave look more believable?

Monday, July 5, 2010

The skinny on lace front wigs


The first time I saw one was on the head of that famous transvestite Ru Paul — and it was in stunning blond.
Then I saw it on the head of Beyonce and yet again on Tyra Banks.
The first time I got to touch a lace front wig it was at a store in a downtown mall.
You would have thought there was a giant magnet in the stoe pulling at a tiny one on my backside or something because I literally froze.
Inside the hair place, which could barely hold five people, one customer sat on a stool holding the stem of an oval mirror up to her face and turned her head this way and that as the store clerk framed her face with the fine netting attached to the wig.
The netting blended into her forehead seamlessly and gave her a hairline.
While one customer edge up closer to the stool for a closer look, two women kept the assistant clerk busy telling her about the wigs they wanted to try.
I managed to slip into the corner of the cramped store and that's whee I came face to face with Michelle Obama -- not the first lady of the US but the lace front wig in her name.
Sleek, straight in a number 2 (hair extension speak for dark brown), it was an asymmetrical bob cut that really captured the essence of the First Lady's do.
The net (lace front) , which framed the hairline extended to just above the mannequin's nose like a veil.
I was told later that once purchased the net is cut to the wearers hairline for a believable look.
Tabs with glue on them , bigger versions of what they once sold in those Lee Press On Nail kits , are sold with the wig to ensure that it stays put.
The cost of the lace front in T&T started at 700 TT (just over 100 US) and I actually convinced a friend to buy one at that price. She only had to put on the wig at the store for a few minutes before she was convinced to buy the synthetic hair.
Poor woman was so in awe of her new look that the following day she raided her man's shoe box of savings and pinched the $700.
That, of course, is another story.
I also talked my neighbour into investing in a lace front. The woman used to wear those heavy and bothersome hair hats before she met me. Would you believe that she has two lace front wigs now and is shopping around for a third.
As for me, I own just one lace front wig -- for now. It's a human hair straight bob that was originally long past my shoulders. I cut it short in order to make it my own, unique to me (see pic)
If you're going to invest in a lace front wig ensure that the quality is good. Try to stay away from synthetic hair if you don't know much about it. The thing with synthetic hair is that it's troublesome, too shiny and has mad fly-aways. Another minus is that it tends to make the wearing look like a human Barbie doll.
Also watch those tabs. To be honest there is really no need for them. In the long run you'd pay the price of hairline loss if you keep using them.(see pic)
Last but not least, ladies please don't go to sleep with your lace front. You may think your man wouldn't notice but honeys hair extensions have a different smell to real hair no matter what product you use in them. And trust me when I say a man has a nose that sniffs that smell out.

Thursday, July 1, 2010

Senegalese twists - the elusive technique


So I got my hair done in the Senegalese twist last weekend and I am pleased with the results. The hairdresser, upon leaving my home (after a 5 hour housecall) gave me her fees for when I want to freshen up the hairline when my hair starts to grow out. But the thing is, poor woman, as sweet, pleasant and professional as she is, she doesn't know that I may not be calling her back for the hairline job. That's because I plan to master this elusive technique once and for all.
Ever since I first had my hair done in Senegalese twists four years ago I have been quizzing my hairdresser friends and braidists about the technique. All of them are mum on the subject. It's as though it is a members only secret club where only a few can be privy to the technique of the Senegalese twist (insert eye roll here).
Then I found out the reason behind the secrecy. Hairdressers are now charging 500 TT (approx 83 US) to part with their knowledge of the technique. Can you imagine that?
One hairdresser friend said she was taught only part one of the technique (there's also the seneaglese corn rows) and had to practice on her own before mastering it.
I pointed the dear lady to youtube where I found this helpful video.
Honestly though it is a tricky process, even with the video in front of you. But I am determined to get it right. Infact, I am really challenging myself to master this technique. I will, of course, keep you posted on my progress.
If you're the kind of person who can follow written instructions, you'd find this Step by Step guide I found at www.black-women-beauty-central.com quite useful.

Step By Step Senegalese Twist Braid Instructions


What You Need

Tail Comb
2 Small Hair Clips
Flake Free Hair Gel or Light Hair Wax (optional)
Synthetic Extension Hair (optional)

Here are step-by-step instructions to make your Senegalese twist braids.

Step 1

Wash, detangle and blow dry your hair properly. (Don’t use oils on the hair before you apply the braids)


Step 2

Part a small section of hair and comb it out properly. Use small clips to keep the rest of the hair out of the way for braiding.


Step 3

Separate the piece of hair into two equal sections. Start twisting each section to the right until it starts to coil on itself (do this for about an inch in length).

If you’re adding extension hair, take a piece long enough to twist all the way past the ends of your hair (to however long you want to braid) and bend it across the two sections of your own hair.


Step 4

Take the two coiled sections of hair and take the piece in your right hand over the piece in your left hand once. Coil the sections to the right again, then take the piece in your right hand over and under the piece in your left hand again.


Step 5

Continue coiling and twisting the section of hair until you get all the way to the ends (the ends will stay in place).


Step 6

Continue to section off pieces of hair and coil and twist them until your entire head is done.


Step 7

Finish styling by (carefully) dipping the ends of your braids into a bowl of boiling hot water to seal the ends.

You can either braid the base of the hair as you would with regular box braids (for about an inch or so) or start twisting it right from the root.

Friday, June 11, 2010

The whole nine (hours)


Nine hours. That's how long it takes for me to complete my own micro-braids (small invidual plaits using braid extensions). Still, braiding my own hair is something I love to doing from time to time, never mind I am stuck up in my room for most of the day.
The very first time I did my own braid I used a pack of Milky Way deep wave hair weave pieces to weaved the back and with micro braids at the front (using the same hair) (See photo)
The result was cool, not perfect because looking back I see the flaws but at least no one laughed when I walked into the office with it the next day.
Since it was just the hairline I was braiding, the process didn't take that long.
One day, when I decided that I was going to braid all of my hair I discovered that it wasn't as simply as just a few braids at the hairline.
And, after nine of the longest hours ever, I finally emerged with a beautiful head of hair.
Practice honestly makes perfect. My first micro braid experience, which I mentioned earlier, was for me a disaster compared to how I now braid my hair.
I have also found that preparation is key. So I may choose to cook early in the morning before I start or order in (my babies got to eat), I shower and then I get to work.
I have also found novel ways to make the 9 hours more enjoyable.
I usually pass the time watching the shows I like on cable or listening to some good music while I braid.
I don't know why but the back of the head is usually the easier part to braid. When I get to the middle it is more troublesome. And it gives me so much pleasure when I reach the second to last plait.
I haven't done my 9 hours in a while. This is something I have to prepare for mentally before doing it. And it also helps to visualise the results too. Last week I acutally sat and had someone do my Senagalese twist for me. It turned out really well and I only had to sit for five hours. But that, of course is another blog.

Thursday, May 20, 2010

Janet Jackson's "haircut"


Gasp!! That was the collective reaction of most people when they saw the US magazine photo of Janet Jackson wearing a short cropped hairdo. Immediatey people across America flocked to websites carrying the story to report on their take on her new do.
One person asked if she was trying to look like Tito, another surmised that it was usual for a woman to cut her hair following something emotional (the death of her brother, her breakup with Jermaine Dupri.) At least one person was on the money when he/she wrote "more like taking out the weave than cutting it."
I snickered to myself at that comment. Every extension wearer knows that Mizz Janet was up in those hair pieces.
She has never gone public with her hair secret like the likes of Tyra Banks but one only has to look at her numerous photos and the dates they were taken to know that healthy head of hair didn't grow out of her roots.
I wonder what they would say when she is craving hair lengths again? Maybe they will report that she grew her hair out again.
I thought today would be a great one for me to look at some of my favourite Janet Jackson extensions in photos.
And just for the record, as extension wearers it's good to give our real hair some air once in a while, so much props to Janet.

Wednesday, May 19, 2010

A morning with the Master (hairweaver)


It’s FRIDAY morning and I’m at Kim’s Salon in Woodbrook in the presence of a master: Clem LueYat, an expert on hair weaving and extensions.
He pops off the clamp that secures my hair, gently tugging at it.
“What beautiful hair,” he says. “It’s so strong, but I can tell that you have been relaxing your hair yourself and that’s not good.”
He was right. I had been doing my hair with those $40TT at-home relaxing kits for months, but never realised that I was damaging my hair.
“Many women choose to buy kits like that because it is cheaper than going to the hairdresser, but it is better to pay a hairdresser $100, or whatever they charge now,” he said. “When you relax your hair on your own, you miss some parts, so some gets relaxed and some doesn’t. By the time you are ready to use the kit again, you are relaxing the same areas and abandoning the same areas all over again.”
For the rest of the morning, hair tips according to LueYat occasionally crept into the conversation. Being in the hair business for over 40 years, LueYat can’t help but share his knowledge. In fact, his visit here from his Brooklyn, New York base was to impart his knowledge on the latest hair trends including his own interlocking hair weaving technique, long hair styling and hair extensions without chemicals and hair replacement.
“Giving back is important,” he said. “This generation has to learn techniques from the older ones.”
In the hairdressing business, time is money and LueYat’s workshops teach hairdressers techniques to work smarter and faster.
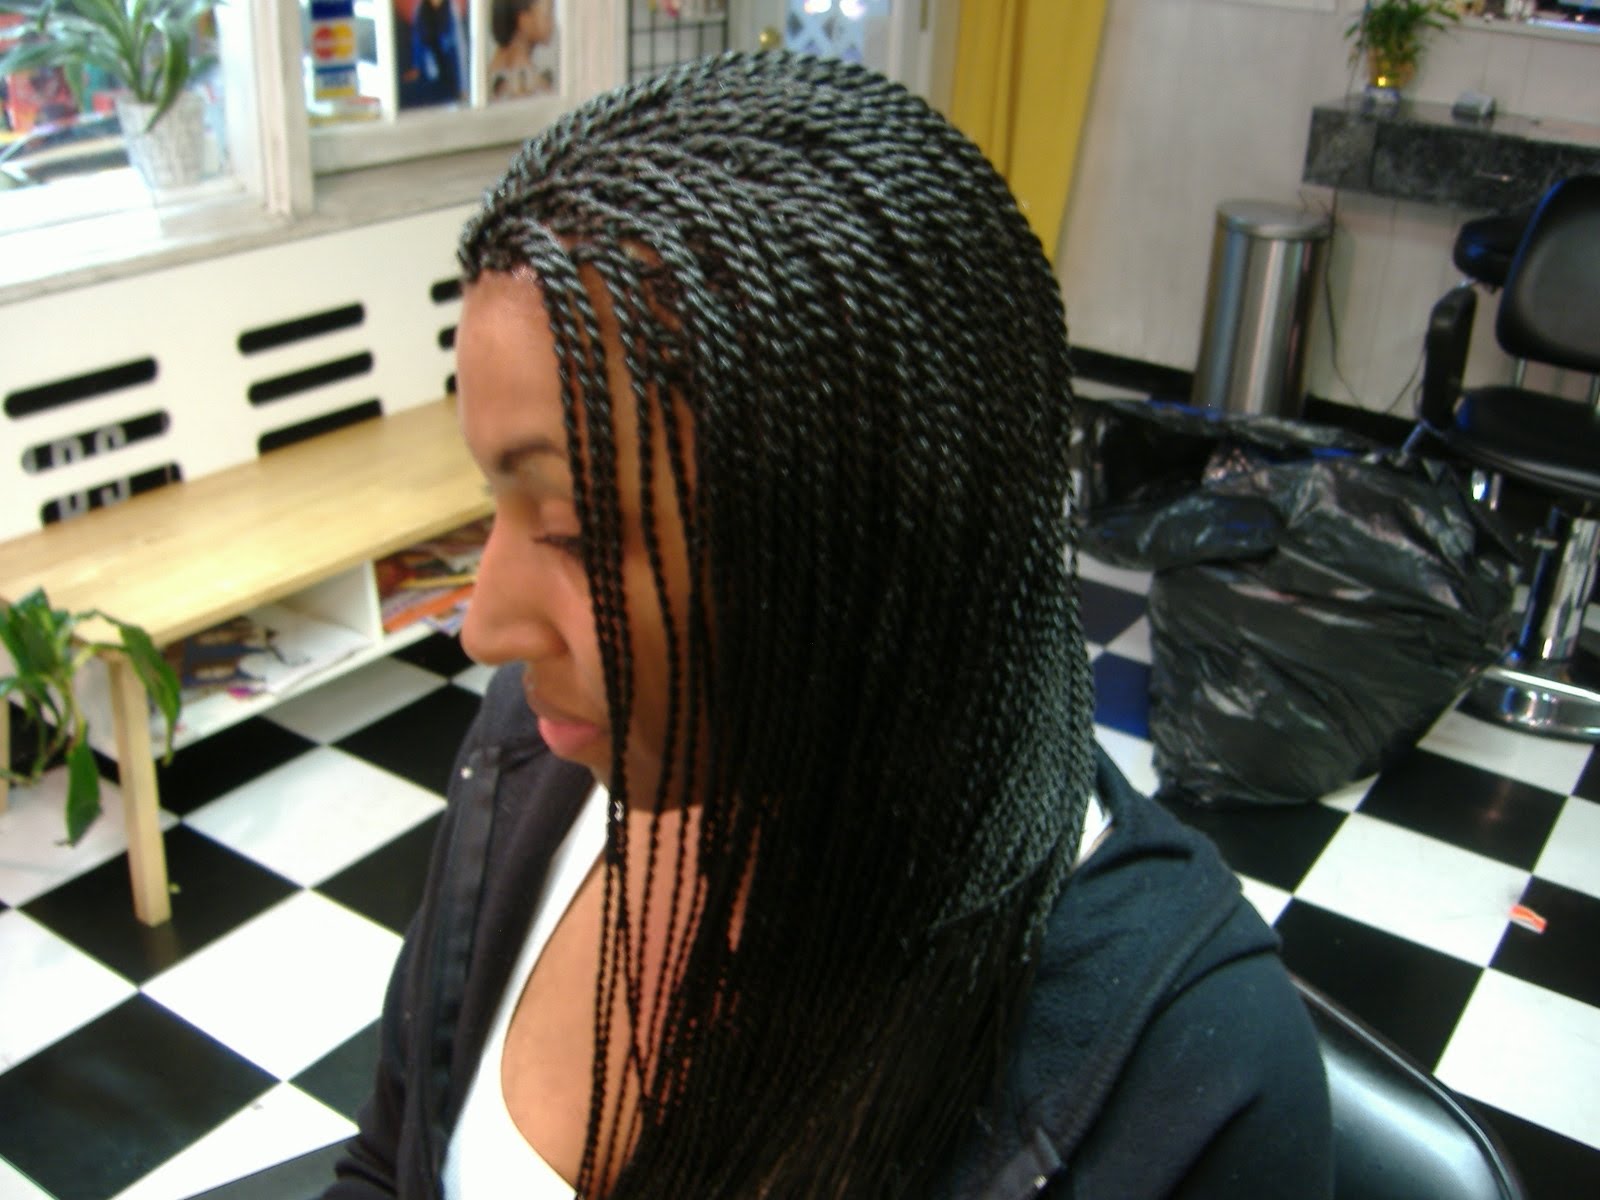
LueYat chose to use his interlocking hair weaving technique to take my hair just past the shoulders.
With this technique, LueYat eliminates the use of cornrows or any pre-tracks and uses only a needle and a single nylon thread.

Buying the hair
The first step in putting on a weave is to buy quality wefted hair (hair that is attached at one end by stitching).
Since my hair was relaxed, LueYat had advised me to choose hair that was similar in texture to my own.
I finally settled on the Ultimate pack of relaxed straight human hair, 12 inches long with a golden-brown colour that matched my hair perfectly.
For extra body, LueYat recommended that I take two packs to get the desired effect.

At the salon
Since I hadn’t relaxed my hair for three months, it was well due for relaxing.
LueYat is known for his hair weaves, but he is also famed for giving elegant coiffures since the ’60s, I am told.
Before he applied the relaxing cream to my hair, LueYat coated my scalp with a grease to prevent me from getting burned.
The only time I ever remembered getting my scalp “based” (the application of grease to the hairline and and the scalp) was at those long-time home-based salons.
“This prevents your scalp from getting dry and being burned by the relaxer.”
And he was right.
Even though I had irritated my scalp by scratching it the night before, I got no burns. After relaxing, deep conditioning and blow drying, I was ready for the next step.

The transformation
For the last ten years, I have worn hair weaves off and on, so LueYat’s counsel on how my head would feel after the weave was done was something for which I was already prepared.
“People always ask if a weave would feel uncomfortable. I tell them, of course it would. I mean, it is something foreign you are putting in your hair. But it should not be painful.”
With a quick pull of the nylon thread from the huge spool, he threaded a C-shaped needle and stitched the wefted hair, piece by piece onto my natural hair.
“As you can see, I don’t use cornrows as other hairdressers,” he said as he worked.
Instead, he used a section of my own hair as a “track” on which to sew the weave, parting with his long pinky finger nail as he went along.
“Time this process to see how long I take,” he said.
LueYat’s weaving technique differs in many ways from that of other hairdressers. He doesn’t cut the wefted hair unless he has to, he doesn’t knot the thread, he uses a single thread to stitch rather than a double thread, one needle rather than several, and he prefers to work with nylon thread rather than cotton thread.
“This lasts longer and it’s more invisible,” he said of the nylon thread.
“When you use cotton thread and you wash your weave, you can see it because the thread swells with water.”
After applying the wefted hair clockwise around the outer portion of my head, it was time to tackle the middle portion.
First, he oiled my hair to keep it in good condition for the estimated three months the weave would be in place and a special reusable net was put over the wrapped hair.
“This wrap will give your own hair on the crown a rest from daily grooming and it will lay flat instead of being bumpy as most weaves are.”
For the middle, instead of using my own hair, as he had done for the outer portion, LueYat put a net in place which served as the tracks on which he sewed the hair.
An hour later, LueYat’s work of art was complete.
Usually, it takes a hairdresser three hours to complete a weave, the process, after relaxing the hair, drying it, putting in cornrows, stitching the cornrows down so it stays in place and then sewing on the hair to the cornrows takes more time.
I now understand why LueYat could complete as many as eight hair weaves in one day.
With scissors in hand, LueYat cut the hair for a seamless finish.
“One must not be able to tell where your hair ends and the weave begins.”
Sitting in the chair looking at the completed product in the mirror, I was in awe.
This was the kind of weave I had only seen on celebrities. I also loved that there were no tell-tale bumps and that no matter how the wind blows, no one would see any tracks.
Photographer David Wears was just as awe-struck.
“Man, I don’t know exactly what you did, but it looks really good.”
As one who wears weaves, I had often admired Clem LueYat’s work was one I often , but had never experienced it until that Friday when I spent the morning in the presence of the master himself.

Hair tips according to Clem LueYat

l To avoid dry scalp and burns, base the hairline and scalp before relaxing.
l Deep-condition the hair before applying a hair weave.
l Tell your hairstylist what kind of look you are going for so that you don’t stray from your own style.
l Use a weave to add colour to your own hair if you are not willing to take a risk with permanent colour.
l Stay away from home relaxing kits. Instead, go to your hairdresser who should be well-trained.
l When touching up your hair, your hairdresser should only apply relaxer to the new growth if you have had your hair relaxed before.
l Choose wefted hair that is close to your own hair colour unless you are experimenting with colour and texture. (Originally published in the Trinidad Guardian Newspapers)

Tuesday, May 18, 2010

Bored and longing for new lengths


I am so bored today. I was just telling a girlfriend that. And when I am bored all I want to do is retreat to my bedroom, sit in front of my mirror and do my hair.
I am currently wearing my hair in Outre's french wave weave. It is a wavy hair that is easy to maintain. No fuss hair.
I put it in myself for Mother's Day. I first left it at its original twelve inches but cut it down after a few days. The heat had a lot to do with my decision to cut but then again I also
hate it when curly extensions are that long. I mean who wants to look like Evelyn Champagne King reloaded? I also deliberately put an invisible part in this particular weave because, for the life of me, I can't understand why people would put bangs in their curly weave and not see Rick James beeyatch in the mirror.
Now I want to toss my wavy weave extensions. I am even bored of that too. This morning while I was prepping for work I thought that I should braid my hair next. Not those long tacky micro ones though, the afro kinky kind that come in different colours and can withstand three times a week shampooing.
But I don't know. The cons to that is that the hair tends to bulk a lot (duh they call it bulk hair too) and within weeks I would have a head of fat plaits falling about my face.
I also have the option of buying a wig with either curly or straight hair. It is a full wig so it would allow me to give my hair a rest. The draw back of a wig though is that when I am home I have to always do something with my natural hair. And therein lies the problem.
Or maybe I should braid my hair using wavy braid extensions? Nah. It's not easy braiding your own hair for 9 hours. Not only does your butt hurt from sitting in one spot so long, so do your hands and arms from moving them all about the head.
So I am back to square one. Still bored but with a spark of excitement still, about what's going to be my next hair move.

Friday, May 7, 2010

Hair by You Tube

Some people go to You Tube to see music videos and upload themselves. I go to You Tube to check out the latest hair weaving techniques.
If you want to learn how to do an invisible part, do a weave without sewing or gluing then you'd find this popular site more than useful.
Most of the tutors on the videos are young girls with a knack for weaving hair.
Almost all of them film their videos in the bathroom or their bedroom and almost all of them can't help but run their fingers through their extensions excitedly upon completion of their hard work.
Last month I learned a new way to braid to ensure that the hair falls nicely on either side of the face.
Two days ago I learned how to use a lace front as a weave.
I still have yet to catch on to that invisible parting technique, in which small pieces of weave hair is stuck to the top of the hair. The result is seamless and scary. You really can't tell where the weave stops and the real hair begins.
Trust me, I would master that at some point. I am a quick learner. Just give me time.
Another bonus on these videos is that the tutors share with the viewers what type of hair they are wearing and how much they cost. They would also share with viewers how the hair behaved after filming the video; for instance if it was tangle free or was a bird nest.
One tutor said that after just two weeks the Onyx brand of hair she bought was dry flat and yucky.
It may have been her hard luck but for viewers like me, I know that Onyx hair extensions is not a product I would be buying anytime in the future.
The next time you log on to You Tube, do a search for how to weave . You'd be amazed at the wealth of hair techniques that are out there.

Wednesday, May 5, 2010

Lunch , punch and Hairdo extensions


The diners at TGIF must have been wondering about my mental state as I sat at the corner table of the restaurant trying on hair.
Between bites of my piping hot buffalo wings and sips of my fruit punch I spent 2 hours talking to the owners of Vanc marketing Charlene and Navin about the packs of hair laid out on the table before us.
The packages were cute see through palstic cases that buttoned shut. Contained in them were extensions that were long, straight,short, curly and at least one was a ponytail.
Honestly I spent the time feeling, ooohing and ahhing at the beauty of these extensions.
In all my years I have NEVER encountered synthetic hair that was heat resistant.
The synthetic hair most are accustomed to crinkle up and lose its shine and texture at the slightest exposure to heat agents like curling and flat irons.
You know those Kankelon braid fibers? That's exactly what those glossy synthetic pieces transform to when exposed to heat.
The synethic hair pieces they sell in T&T are made out of plastic-like fiber, hence the no heat warning.
The Hairdo braid, however, is made up of its own brand of fibers called True2Life.
To the touch, the hair is soft yet not doll-like and thank goodness it doesn't pack the shine as most synthetic hair tend to do.
The hairpieces are also clip-ons which means no needles, no thread, no cornrows, no glue.
The clips were so small I didn't see them at first. They are made of a metal and clamp shut to keep them in place on the head.
The Raquel Welch line features memory caps on its wig line so that you never have to fuss about scoring the same look with each wear of the wig.
As a wig wearer I know that there are days when you can get the perfect wig fit (the part in the right place, the sideburns properly lined up to flatter your face) and the days when you have to spin that wig all over your head just to get the same look you got the last time you put the wig on.
The memory cap wigs are sold with head forms to ensure that the shape is kept. For we all know, well most of us anyway, that a wig can stretch a size up if it isn't placed on a proper form between wear.
How many of you have had to knot your wig band to prevent it from stretching? (My two hands are up). For my non wig wearers, the wig band is much like your bra strap with the same features. And you know how often you have to adjust a bra strap!
At TGIF I also tried on a clip-on bang, which I actually walked out of the restaurant wearing, as a parting gift from Vanc.
They also gifted me with a ponytail which is secured with velcro.
I like that the bangs are full and healthy looking and I didn't have to cut my hair to achieve it.
The Hairdo line is the brainchild of Ken Paves, only one of the most noted celebrity hair stylists.
Among Hairdo's wearers are Eva Longoria, Beyonce and Jessica Simpson (who inspired the line).
I couldn't take my eyes of a short curly honey and brown clip-in wig.
I think this little baby should be my Mother's Day gift. I'm working on gifting myself with it but I must shift around things in my budget to achieve such. Wish me lots of luck.
Check out : "http://kenpaveshairextensions.com/ for more photos and colour options.

Monday, May 3, 2010

the right way to ponytail @ home

We've all done it.
We wake up in the morning, dress for work and suddenly realise that the cute navy skirt suit we're wearing would really go better with a long flowing, perfect ponytail extension. Then comes the dilemma -- we don't have one!
What's a girl to do then? Certainly not wing it, like I saw a lady do just yesterday in a taxi.
She had black hair and thought it clever to bobby pin in wefts of scarlet coloured weave hairpieces on top of her her own short ponytail.
The result was disastrous! Weave wefts were showing everywhere.
Look, if you are going to do a ponytail without the store-bought clip-in or draw string ponytails then at least make it look sleek, professional and seamless.
I usually stack up my used hair weave pieces one on top the other (never throw away your used weaves, you never know when you may need to use them again), brush them out, and then roll the hair from one end of the weft to the other. It ends up looking like a coil on top and as easy as that you now have your home-made ponytail.
To put the ponytail in, brush your own hair and hold it in a pony. Don't use your scrungie yet, just your hand to secure the hair in place. In the space where your hand is circled around your ponytail, push in the coil. Your hair will then cover this completely, then you can secure the hair and homemade ponytail with your scrungie.
Make sure that your hair matches the weave piece you use. In other words, if your hair is black don't use scarlet!
The result is seamless with your hair blending into your extension. Money saved and the look still fierce.
Later today I am going to meet with a local representative of the Racquel Welch hair and Hair do extensions. I will get the chance to explore the range of synthetic, human hair, ponytails, clip ons. It will be my experience with the product, although I have heard about it before. Am I excited? Hell yeah. I barely made it through the weekend thinking about all that hair.
Will tell you all about it tomorrow.

Friday, April 30, 2010

my love affair with extensions - in the beginning

Chris Rock may have his idea about good hair, bad hair, extended hair. But what does he know about hair anyway when his doesn't grow more than a few inches from his head!
Look I am a hair extensions lover and proud of it. Chris Rock should have done an interview with me for his show. He would have had to call off the whole thing or change the title!
Blame my mother for introducing me to fake hair oooops.....never say that around here, it's hair extensions.
After a hairdresser jacked up mummy's hair with a played out jherri curl, mummy started wearing extensions.
You know how some mothers buy shoes that as girls we got to try on from time to time? Well mummy bought hair, and lots of it.
Back then Tina Turner and Diana Ross were her hair gods.
Often she would take me and my sister on her hair shopping adventures. She used to bounce from store to store just so she leave with the hair she really wanted.
She used to ask the salesgirl to see different packs of hair, had her lay them out on the counter and run her fingers through the hair extensions to see if they measured up.
Hair that was too stiff to the touch was deemed unfit for purchase, so too hair with too much shine. Hair that was silky and soft, she would have the salesgirl bag.
For the curly hair mummy use to sneak a little water in and put on her finger tips. Whenever the salesgirl turned her back or was pre-occupied with a customer, mummy used to put the water on the hair. And if that wet and wavy baby didn't curl with the water on it, back to the shelf it would go.
No price was too much for mummy to pay for her extensions.
She once ordered hair from London and when it came in single strands (rather than a weave weft) she tied a length of thread on either side of the kitchen cupboard knobs and strand by strand created her own weft of hair for weaving.
The process was time-consuming yes, must have took her two days, but mummy was only concerned that after all her effort, the hair was the best she ever wore.
I started wearing extensions in high school - long curly ones. Mummy weaved them in. I was 16 then but the way it bounced on my shoulder and how it looked in a french braid, my love love affair with hair extensions had only just begun.